الخميس
keeping it clean

It's important to keep the cap of your spraycan clean. The manufacturers suggest that you turn your can upside down and spray untill only gas (and no paint) comes out of the nozzle. My opinion however, is that since I'm gonna spray loads of small paint jobs, this technique might empty the can of gas before I'm finished. Two coats of paint on one leg means I'll have to clean the nozzle 8 times. So my trick is to take of the cap and simply blow through it untill only bad breath comes out the other end.

الاثنين

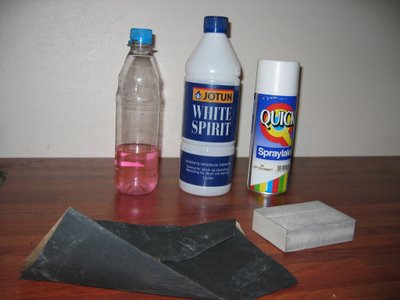
The content of this picture took me the better part of one day to get. It's a foamblock with a rather rough sandpaper attached to it, this will be used to even out some melting marks doen by the low-cost production.
There's some very fine wet sanding paper that I plan to use to even out any hiccups between the coats of paint.
There's Spirits to clean the part before spraypainting them.
And there's a can of white spraypaint. As an old graffiti writer I must admitt that Quick is not my favorite brand, but I got it for free from one of these people: http://museumsvert.blogspot.com/


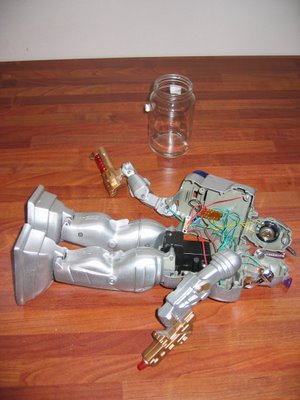
Keep all your small parts somewhere safe. All those itsy bitsy screws will get lost before you know it. To keep my losses to a minimum, I've got one glass container with a metal screw-on lid. The old toddler dinner glass was generously donated to the project by this young man: http://www.kepers.blogspot.com

Third
Next stop: the tea kettle

And its not for a hot cup of tea I'm afraid (even though that do sound nice). Boiling up some water produce a nice steam that works perfect for removing the stickers that decorate the toy robot.
These stickers cover some of the screws I need to access in order to take it apart, and I dont want those half-ass stickers on my finished Crobot anyway.

FIRST
The first thing to do is to find out who the Crobots are. I found out by aimlessly surfing the internet, and coming across this webpage:
http://www.crobot-crew.com/
The two old school Crobots named Xed and Jumbo are the coolest droids ever! The rest of the crew might be cool, but I really doubt they can meassure up to these two.. There's even a roumor that one time the two ol' croonoids hooked up with a biped from the frozen fjords of Norway! -I cant imagine anything other than mischeave coming out of that, but anyway..
Getting started
OK, this blog isn't gonna run for too long. I will try to make a Crobot, and document it here on this blog.
Hopefully, you will be able to recreate the prosess, and make your own Crobots by following my pictures and descriptions. And if I fuck up along the way, You will learn how NOT to do it.
Hopefully, you will be able to recreate the prosess, and make your own Crobots by following my pictures and descriptions. And if I fuck up along the way, You will learn how NOT to do it.


